Eclipse Plugin Installation
In order to start working with the Eclipse Plugin, you need to get it installed and authenticated to your PaaS account within its settings. So, launch your Eclipse IDE and proceed with the instructions below.
Plugin Installation
- Open the Eclipse Marketplace page with the platform Plugin in a browser. Click on and drag the plugin installation button (circled in the image below) into your running Eclipse workspace.

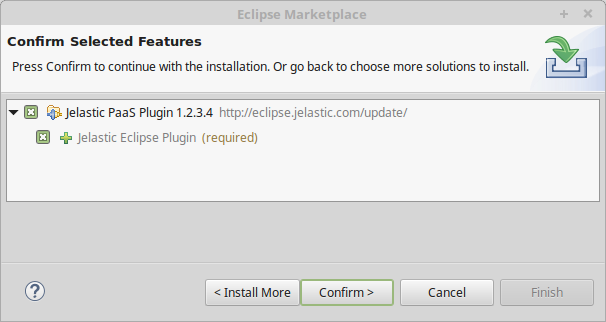
- In the opened frame you can check and edit the list of installed software. In our case, there is only Eclipse Plugin listed, so just click on Confirm.

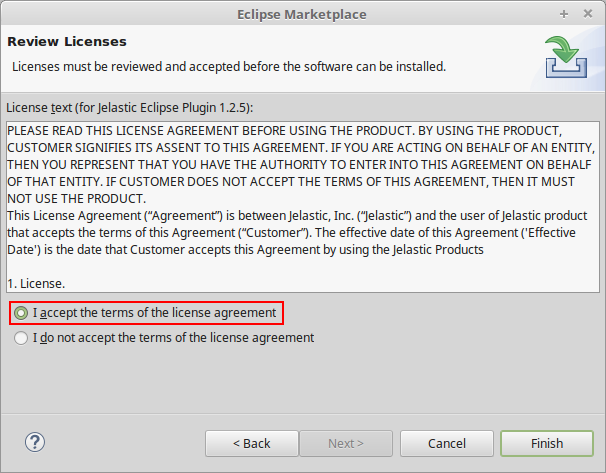
- At the next step, you’ll need to read and accept the license agreement.accept plugin license agreement.

Click on Finish in order to proceed with installation.
- If you receive a security warning, click the Install anyway button to proceed and wait a minute for this operation to be completed.

- Restart your Eclipse IDE by clicking Restart Now on the last frame to apply the changes and finish installation.

Authentication with Account Credentials
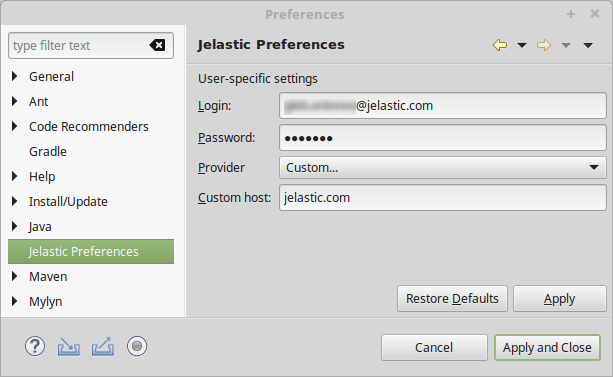
To get started with PaaS, you need to connect the plugin with your account at a platform. For that, navigate to **Window > Preferences > PaaS Preferences. ** In the opened tab, fill in the Login and Password fields with the corresponding values and either select the required hosting Provider from the list of available ones (for Public Cloud) or type the Custom host manually (for Private Cloud).

Select the Apply and Close button to confirm the entered data. That’s all the required configurations! Now, having the Eclipse plugin installed, you can manage environments and deploy new projects easily without switching between IDE and browser.